Creating vector images
Introduction
This will be a short tutorial about how to create simple vector drawings.
This small guide will cover 2 softwares:
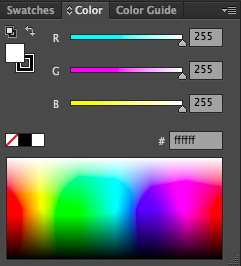
- Adobe Illustrator (AI – left)
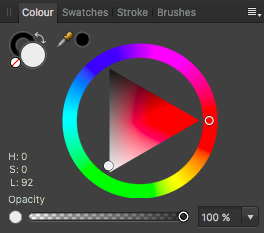
- Affinity Designer (AD – right)
Talking about different softwares is, I think, a good way to understand that they do the same thing: creating vectors.
Choosing one upon another is more a matter of personal preference.
Prerequisites
Knowing about what is a vector drawing of course :)
I have made a small introduction here
What is it NOT about
Softwares are just tools.
So it won’t improve your drawing/design skills in any way.
It will just allow you to express whatever you’re able to do in another way.
Keyboard shortcuts
For working right, you really need to learn some basic keyboard shortcuts.
This will greatly improve your experience with the software and make things more natural.
Of course you don’t have to remember everything :) Just the most common ones.
Mac/PC
In Illustrator (as AD is mac only) when I will talk about the key CMD you should replace it with CTRL
doing/undoing
Like in every software you can achieve those actions by pressing:
undo: CMD + Z
redo: SHIFT + CMD + Z
Interface
The folks from Affinity organized AD in almost the same way as AI.
There is some differences of course, but globally things are the same.
- Illustrator
-
- Affinity Designer
-
Context properties…
…will change with the tools you use or the selection you have.
It will provide the most common options you should need a this moment
Toolbar
It’s the same things as real tools, they are needed to do stuff.
One very important thing is every tools has multiple powers.
Those are unlocked by pressing additional keys (CMD ALT SHIFT) while using them.
Of course, using a tool, is clicking on it to select it.
More tools!
When you see an arrow in the tool square, It means that by making a long press on this tool, you can access other tools!
Artboard(s)
This will be your main working zone. Details will be provided later on.
Panels
A lot of stuff are placed here.
It can be colors, layers and so on.
Every panel can be grouped with tabs.
And every panel as some options:
You can check it every time you want. Be curious :P
Information / Keyboards modifications help
- Illustrator
-
- At the bottom, there is different information about the zoom level, which artboard are you working on and the current tool used.
- When you use modification keys (see Toolbar) the current tool will change to reflect what you are going to do
- Affinity Designer
-
- Every time a small description of what and how you can achieve with the tool you have selected.
- They also list all the modification keys you can use, and how they will change the behavior of the current tool.
Moving
Working is always getting on different parts of your artwork.
With a virtual paper, you have new ways to navigate inside your design.
Hand & magnifying glass
- Illustrator
-

- Affinity Designer
-

move: this is the hand tool. It will allow you to span around the working zone
This by doing click & drag
zoom: this is the magnifying glass tool. It will allow you to be closer or farther of your design.ALT to unzoom.
the better way
whatever tool you have selected those shortcuts works:
move: SPACE + click & drag
zoom/unzoom CMD + + / CMD + -
Artboard
Those are your working area.
It’s like custom sized sheets of paper and you can have as many as you want.
I won’t cover it here, and stick to the default preset: 1 artboard.
Creating shapes
We will cover here only one tool to create custom shapes: the pen tool.
Predefined shapes (like rectangles, ellipse and so on) usage is I think obvious.
There is of course other way to create shapes, but focusing on the pen tool is a good to way to know the core of making vector shapes.
Making the shape
- Select the
pen tool
- Illustrator
-

- Affinity Designer
-

- Then click on your artboard.
- Each click will make another point.
- If you
click & drag, then you will create a point with handlers.
To close a path click on the first point you have created (like in the above example).
Editing the shape
You may to edit your object in 2 ways:
- move, rotate or scale the whole object
- edit the shape in itself
And there is 2 different tools to accomplish this:
- Illustrator
-
 __Black arrow__: named *selection tool*
__White arrow__: named *direct selection tool*
- Affinity Designer
-
 __Black arrow__: named *move tool*
__White arrow__: named *node tool*
The black arrow
will allow you to select a whole path.
When a path is selected, you have a selection box around your object.
- moving:
click & dragfrom inside the shape- multiple can be made by pressing
SHIFTand click on the shapes you want
- multiple can be made by pressing
- rotating:
click & dragfrom a little further from a corner. the icon should change appearance - resizing:
click & dragfrom any point of selection box - constraint: each transforms can be constrains (move on determined angles, scales proportionally…) by pushing
SHIFTwhile dragging
The white arrow
will allow you to select a point in a path.
And also to modify the handlers of a point (if any).
You can move many points by selecting them with SHIFT.
There is some difference in behavior in AD an AD:
- In Illustrator
-
…selecting a shape with the white arrow will select all the points
So be aware of your selection. - In Affinity Designer
-
…the white arrow allow also to modify a
stroke.
SimplyClick & dragon a stroke to reshape it.
pen tool (the return)
The pen tool has also abilities of editing a shape thanks to the modification keys
AD & AI treats it differently:
- In Illustrator
-
Adding a point:
clickon a path
Moving a point:CMDfor getting in white arrow mode (SHIFTfor multiple selection)
Removing a point:clickon a point
Adding handlers to a point:ALT+click & dragon a point
Removing handlers of a point:ALT+clickon a point
Breaking handlers
with selected pointALT+click & dragon an handler - In Affinity Designer
-
Adding a point:
CMD+clickon a stroke to add a point
Moving a point:click & dragon a point (SHIFTfor multiple selection)
Removing a point:
select points byclickthen pressDEL
Adding handlers to a point:click & dragon a point (have to be onMode: penin the context bar)
Removing handlers of a point:
selecting handlers and in the context bar click onconvert -> the type you want
Breaking handlers:
whiledragging an handlerclick onALT
Reshaping a stroke:click & dragon a stroke
Styling shapes
Colors
After having a shape selected, fill & border can be styled in the color panel:
- Illustrator
-

- Affinity Designer
-

- What you are styling appears above the other one.
clickto select between border & fill.double clickto open a more detailed color panel.
Stroke
You can also modify the size of the stroke by tweaking on the context properties.
- In Illustrator
-
All the stroke properties are put next to each another.
You can also access a stroke panel by clicking on the stroke link - In Affinity Designer
-
by clicking on the stroke line, a panel will open with all the options you need
Exporting an artwork
Because vector drawing drawings are computed, you can generate a lot of different files type with those, including JPG (pixel), PDF and SVG (one of the most interoperable vector format)
Artboards helps you by cropping everything that’s outside their boundaries.
- In Illustrator
-
- In the menu: File -> Export
- Choose the format (JPEG is good for showing to anybody)
- check the Use Artboards checkbox
clickexport
- In Affinity Designer
-
- In the menu: File -> Export
- Choose the format
clickexport
Conclusion
There is of course more to see like:
- layers
- Combining shapes
- effects
- …
Affinity provides a lot of great tutorials here